Asheron's Crypt
![]() Back to Quests
Back to Quests
Explore the haunted crypts under Asheron's Estate and test your wits against the skeleton-filled maze of keys and puzzles.
Contents |
Prelude
Requirements: Completed Crypt Keys II
Type: Group
Start Location: Asheron's Crypt, Realaidain Estate, Knorr Gardens
Asheron's Crypt is the name of the dungeon in which you complete a series of interrelated quests. There is no actual journal quest by this name - each journal quest inside the dungeon is listed under this header for convenience. All of the quests to follow begin and finish at the same time and have no distinct quest starter. Much of the work for the series is done prior to receiving the first quest and that will be explained in this section.
To begin, travel to the Crypt Door at 59.4S, 59.2E on Realaidain Estate, southeast of Greenstone, and use the door to enter. This section ought to involve a lot of key-gathering and door-opening which, thanks to the Mining Carenzi door-opening bug, is now unnecessary. If you wish to do the quest as it was intended then skip to the long version.
The Crypt - Short Version
Inside the dungeon, after the first door, you will meet a central corridor running west - there are two outside corridors which also run west and all three have small rooms adjoining them. These rooms may have Crypt Chests inside which are your target. Any Crypt Chest may have Chroma Spheres in them. You must find a blue, cyan, green, yellow, red and magenta variety of these Chroma Spheres. Only one person must collect all six if you are doing this in a fellow since they may be passed on after use.
Many of the Crypt Chests trigger the spawning of a level 65 solo Greater Sepulchral Bones and three level 60 solo Sepulchral Bones upon entering the room. For this reason it's advised to do this quest as a group.
If there are not enough Crypt Chests in the opening corridors, travel further west, through the room with the Gold Crypt Key, taking either corridor on the west wall. The room with the Gold Crypt Key can be ran through without much danger of being followed if there are too many to fight.
Once you have found enough Crypt Chests to gather all six Chroma Spheres, turn around and head east to reach the door you passed through upon entering the dungeon. From here, go north and hug the right wall. You will go down a staircase and encounter a door which cannot be selected. Use your carenzi until it opens and move onto the 'Portcullis Maze' section.
The Crypt - Long Version
Throughout the crypt, you will find Crypt Chests. They contain loot, and more importantly, Chroma Spheres. While exploring the dungeon, be sure to loot some chests and keep one of each sphere: Yellow, Green, Cyan, Red, Magenta, and Blue. You will need these for the final room of the crypt. Also, beware of "trap" spawns. When you pick up a key, open a chest, or sometimes just walk into one of the small rooms, as many as four Sepulchral and Greater Sepulchral Bones (60-65, solo) will spawn around you. Make sure you are healed up before opening any chests, as their armor-piercing special attacks can hurt in groups, even at high level.
- When you first enter the crypts, take a left and head towards the east. Continue down this hallway and you should see the dot for the Brass Crypt Key on radar. Pick up this key.
- Head in a westward direction and you will come to a large room full of skeletons, chests, and a Gold Crypt Key. This key appears to be just a trap to get you to fight more skeletons, and has no known use. Ignore it but remember this room, as you'll have to backtrack to it. Look for two exits on the same wall, heading down out of the room. I'll call these two exits the "northern crypts" and "southern crypts."
- Head first to the southern crypts. The southeast hall in this area will lead to a locked door, which you can open with the Brass Crypt Key. The Silver Crypt Key spawns behind this door.
- Once you have the Silver Crypt Key, go to the northwest hallway of this area. You'll eventually arrive at a Crypt Guardian and a locked portcullis. Open this door with your Silver Crypt Key (sometimes, the Crypt Guardian will open it for you). The Iron Crypt Key spawns here. Pick it up, and head all the way back to the big room with the skeletons and the gold key you ignored earlier.
- Now, take the northern crypts exit out of this room. Head all the way north until you find a locked door. Your Iron Crypt Key will open this door, which allows you to pick up the Bronze Crypt Key behind it.
- Before progressing any further, be sure you have a full set of six Chroma Spheres. Next, head all the way back to the big gold key room again. This time, go back to the east where you found the first key. This area has a locked door with a lever behind it, and the Bronze Crypt Key opens this door.
- You'll have to move quickly at this part. Pull the lever, and run straight out of that room until you come to the area where you first entered the crypts. Take a left, run down that hallway, and through the door at the end which should now be open, thanks to the lever. If it's closed, you probably didn't move quickly enough.
Portcullis Maze
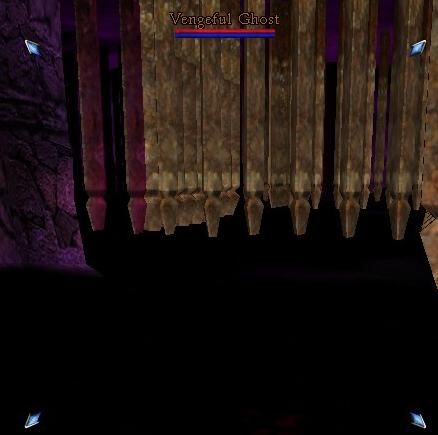
- This area is a small portcullis maze. Some gates you can open, and some you cannot. Mouse-clicking or cycling through items with keyboard shortcuts are the best ways to find out which you can open. Beware the Vengeful Ghost, an invisible monster which will attack and annoy you as you progress through the maze. You cannot kill the ghost. Your goal is all the way to the north, where you will see a Chromatic Door. Enter it to get that pesky ghost off your back.
Chromatic Room
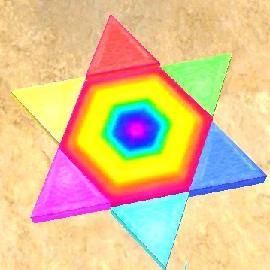
- Now, it's time for the real puzzle. The star in the room has six triangles at its points, each a different color, and a multicolored center. Handing Chroma Spheres to the individual points changes their color, and clicking on the center gives you hints. Handing a Chroma Sphere to the triangle does not remove it from your inventory. The idea is to turn the points to the correct color, then click them in the correct order. There are six different solutions, and each one will grant you XP and loot from a Realaidain Chest.
- To solve the puzzles, first orient yourself so that the red triangle is at the top of your screen. For purposes of this guide, I'll number these colors, clockwise: Red 1, Green 2, Blue 3, Cyan 4, Magenta 5, Yellow 6. Hand the spheres of the appropriate color to the triangle as noted below, then click each triangle in the order shown. A "click" will mean it's set correctly, while a "clack" is an incorrect color.
After each solution, loot the chest to begin and finish the quest. Enter the "Back to Crypts" portal to return to the Chromatic Door. The triangles will revert to their original colors after a minute or two. The solutions are as follows:
Chroma Keys #1
Quest Starter: Realaidain Chest
XP Reward: 1% (Cap: 96,204,555 @ L65)
Other Rewards: Realaidain Chest
Repeat Time: Unrepeatable
| Tile | Applied Chroma Sphere(s) | End Color |
|---|---|---|
| 1 Red | Yellow -> Green | White |
| 2 Green | Cyan -> Blue | White |
| 3 Blue | Cyan -> Green | White |
| 4 Cyan | Red | White |
| 5 Magenta | Green | White |
| 6 Yellow | Blue | White |
Once you have the correct color pattern, use the tiles in the order: 1, 2, 3, 4, 5, 6.
Chroma Keys #2
Quest Starter: Realaidain Chest
XP Reward: 1% (Cap: 96,204,555 @ L65)
Other Rewards: Realaidain Chest
Repeat Time: Unrepeatable
| Tile | Applied Chroma Sphere(s) | End Color |
|---|---|---|
| 1 Red | Cyan | Black |
| 2 Green | Magenta | Black |
| 3 Blue | Yellow | Black |
| 4 Cyan | Yellow -> Magenta | Black |
| 5 Magenta | Cyan -> Yellow | Black |
| 6 Yellow | Magenta -> Cyan | Black |
Once you have the correct color pattern, use the tiles in the order: 1, 6, 5, 4, 3, 2.
Chroma Keys #3
Quest Starter: Realaidain Chest
XP Reward: 1% (Cap: 96,204,555 @ L65)
Other Rewards: Realaidain Chest
Repeat Time: Unrepeatable
| Tile | Applied Chroma Sphere(s) | End Color |
|---|---|---|
| 1 Red | Yellow -> Green | White |
| 2 Green | Magenta | Black |
| 3 Blue | Cyan -> Green | White |
| 4 Cyan | Yellow -> Magenta | Black |
| 5 Magenta | Green | White |
| 6 Yellow | Magenta -> Cyan | Black |
Once you have the correct color pattern, use the tiles in the order: 5, 1, 3, 6, 2, 4.
Chroma Keys #4
Quest Starter: Realaidain Chest
XP Reward: 1% (Cap: 96,204,555 @ L65)
Other Rewards: Realaidain Chest
Repeat Time: Unrepeatable
| Tile | Applied Chroma Sphere(s) | End Color |
|---|---|---|
| 1 Red | Cyan | Black |
| 2 Green | Cyan -> Blue | White |
| 3 Blue | Yellow | Black |
| 4 Cyan | Red | White |
| 5 Magenta | Cyan -> Yellow | Black |
| 6 Yellow | Blue | White |
Once you have the correct color pattern, use the tiles in the order: 6, 2, 4, 5, 1, 3.
Chroma Keys #5
Quest Starter: Realaidain Chest
XP Reward: 1% (Cap: 96,204,555 @ L65)
Other Rewards: Realaidain Chest
Repeat Time: Unrepeatable
| Tile | Applied Chroma Sphere(s) | End Color |
|---|---|---|
| 1 Red | Yellow -> Green | White |
| 2 Green | Cyan -> Blue | White |
| 3 Blue | Cyan -> Green | White |
| 4 Cyan | Magenta -> Cyan -> Yellow | Red |
| 5 Magenta | Yellow -> Magenta -> Cyan | Green |
| 6 Yellow | Magenta -> Yellow -> Cyan | Blue |
Once you have the correct color pattern, use the tiles in the order: 1, 4, 2, 5, 3, 6.
Chroma Keys #6
Quest Starter: Realaidain Chest
XP Reward: 1% (Cap: 96,204,555 @ L65)
Other Rewards: Realaidain Chest
Repeat Time: Unrepeatable
| Tile | Applied Chroma Sphere(s) | End Color |
|---|---|---|
| 1 Red | Green -> Cyan -> Yellow | Cyan |
| 2 Green | Cyan -> Magenta -> Yellow | Magenta |
| 3 Blue | Magenta -> Yellow -> Cyan | Yellow |
| 4 Cyan | Yellow -> Magenta | Black |
| 5 Magenta | Cyan -> Yellow | Black |
| 6 Yellow | Magenta -> Cyan | Black |
Once you have the correct color pattern, use the tiles in the order: 4, 1, 5, 2, 6, 3.
Asheron's Vault
Quest Starter: Center Tile
XP Reward: 5% (Cap: 481,022,793 @ L65)
Other Rewards:
Repeat Time: Unrepeatable
Having completed all six Chroma Key solutions, simply enter the puzzle room again and click the center tile to complete Asheron's Vault and receive your reward.
Cerulean Throne
Quest Starter: Cerulean Throne
XP Reward: 10% (Cap: 962,045,586 @ L65)
Other Rewards: +25 Focus buff, 8 hours
Repeat Time: Unrepeatable
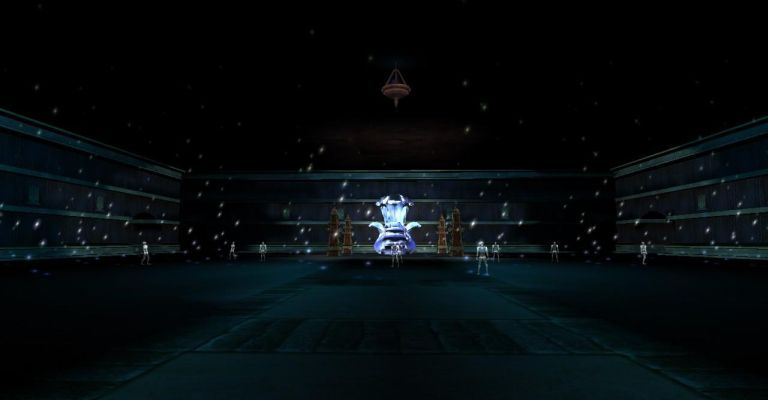
Once you've completed all six Chroma Key puzzles and the Asheron's Vault quest, you will be portalled to the deepest part of the Crypts. Head south towards the Throne Spirit Equerry. The spirit will not attack you, although he isn't very happy to see you. Open the door to the Throne Room. Your goal is to touch the throne, and there are two ways to do it.
The sparkling areas in the center of the room are essentially walls, and you can maneuver around them to reach the throne. You can kill the spirit guards (65, solo) here, but they respawn quickly. The other option is not to enter the main door to the Throne room, but instead go around the sides. There are Servitors here (59, group) which can be avoided or killed.
The side rooms offer a more direct path to the throne, but the monsters are stronger. Whichever direction you choose, touching the throne will start/complete the Cerulean Throne quest and you will obtain your reward.


